8 insider tips on making your car showroom clean
Before we get going, you may be wondering ‘What is car detailing?’ It’s an American term for car valeting. Essentially, both refer to giving your car a top to bottom deep clean both inside and out. If it sounds like this will take a lot more time than a quick run through the car wash, you’re right. And there are many companies who will take on the task for you with costs ranging from tens to hundreds of pounds, depending on how ‘show room ready’ you want your car to look.
If you’d prefer to detail your car at home. Here are some steps to guide you through how to detail a car, along with a list of what you’ll need
1. Pre-rinse
What you’ll need: Jet wash or garden spray gun
A bit like a pre-dessert in a posh restaurant, this may sound like overkill. If you’re planning on doing a thorough job, it’s essential to start as you mean to go on. And a pre-rinse will remove all that surface dirt that would otherwise become stuck in your wash mitt.
Using a jet washer or your garden hose spray gun, start at the top of your car and rinse loose dirt from the body work, wheel arches and wheels.
2. Wash
What you’ll need: 2 buckets, car shampoo, wash mitt
Fill one bucket with your car shampoo and water. The other just needs clean water.
Dunk your wash mitt in the shampoo mixture and start again at the top of the car. Work your way down, removing any of the remaining dirt. Remember to rinse your wash mitt in the clean water regularly. Depending on how dirty the car is you may need to repeat this a couple of times.
3. Rinse and dry
What you’ll need: Jet wash or garden spray gun and a microfibre cloth
Start again at the top of the car with your jet wash or hose. Rinsing off all traces of shampoo. Next, grab a microfibre drying cloth and work in gentle sideways motions. These cloths are great for leaving a streak- free finish.
4. Clay barring
What you’ll need: Clay bar, clay bar lubricant, bucket of water and shampoo, wash mitt
Clay barring isn’t for every wash and it’s wise to get some guidance from a specialist motoring shop before you give it a go. This step will remove any contaminates from paintwork, leaving it smooth and ready for wax to be applied. Break some of the clay and work it into a small circle shape. Moisten the clay and the panel of the car you are cleaning with shampoo water. Spray lubricant onto the surface and working in small sections, gently glide the clay over the paint in a sideways motion.
As you remove the contaminants, the clay will become easier to move. Remember to fold the clay bar in half and knead back into shape as it becomes dirty. But it’s best to throw it away if you drop it on the floor.
Once you’re finished give the paint work one last rinse with your hose or jet wash.
5. Polish and waxing
What you’ll need: A polish and wax, microfibre cloths or foam applicator
Generally, an all in one polish should give you a great finish and, in less time, than separate polish and wax solutions. It’s worth having a chat to a specialist in your local motor store to make sure you buy the products that are right for you. Once you’ve chosen your polish/wax products, take care to read the instructions. With most you’ll need to apply with a foam applicator or microfibre cloth. Work in small sections, applying the polish in straight lines and working in with a separate microfibre cloth until all streaks are removed. Work panel by panel. Once you’ve finished you may like to add a layer of paint sealant or carnauba wax.
6. Clean the wheels
What you’ll need: Wash mitt, wheel brush, bucket of shampoo, specialist wheel cleaner and tyre foam
As with polish, there are lots of wheel cleaners available so spend a bit of time finding the one that’s right for your car. Spray the cleaner onto the outer and inner sections of your wheels. Then take your wheel brush or wash mitt dunk it in the shampoo and give the wheel, spokes and rear of the wheel a good scrub to remove any remaining dirt. Give the wheel a rinse with your jet or hose and finish with a spray of tyre foam for a show room finish.
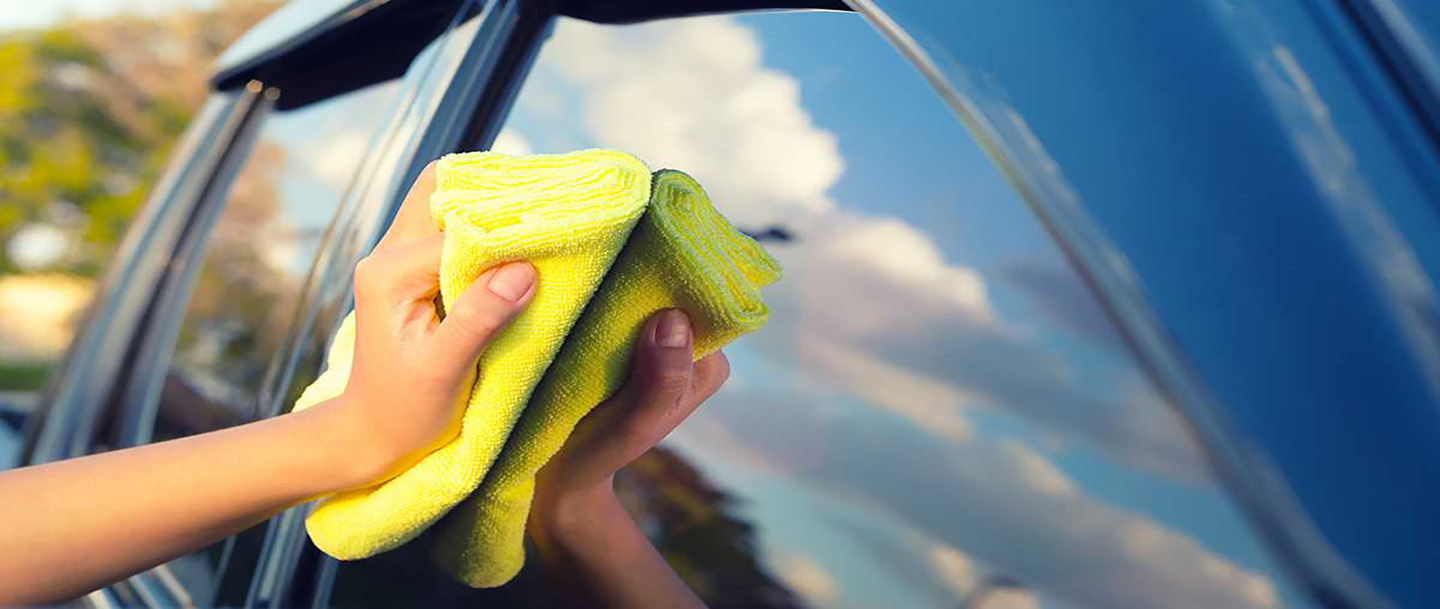
7. Glass work
What you’ll need: Glass cleaner, microfibre cloths
Glass attracts a lot of dirt, from external bugs and dust, to internal sticky fingerprints. And while it’s nice to keep your car’s paintwork looking spotless, with windows there is an important safety element to ensure you maintain visibility.
Ideally, you want to work in the shade so that any streaks are visible. Start by winding down the windows slightly to give you access to the rim where dirt can build up. Spray your chosen glass cleaner on the surface of the windows and windscreens. It’s a good idea to focus on one window at a time, cleaning the exterior then the interior. Use one microfibre cloth to spread the spray in a horizontal direction from top to bottom. Then use a second to remove any remaining cleaner and polish out streaks.
8. Interior
What you’ll need: Vacuum cleaner with attachments, bin
Start by removing everything from the car. Placing any rubbish into the bin. Use the attachments on your vacuum cleaner to get into the small spaces and to give the seats a deep clean. It can also be handy to have an old toothbrush to dislodge dirt from the handbrake, gear stick and small areas around the dashboard.
Move seats forwards and back to make sure you have vacuumed thoroughly underneath. Change the angle of the seats so that you can get to any dirt that gathers in between the back and bottom of the seat. Use a specialist interior cleaner to remove any stubborn stains on the carpet or upholstery. Wipe over hard areas with a clean microfibre cloth and then finally vacuum mats on both sides before putting them back in.
This is a guide to detailing your car from the comfort of your own driveway and can be a really satisfying job. Of course, if you want a showroom finish then you can’t beat a specialist car detailing service.
